

How to organize your personal health documents effectively
The fastest way to get your health records under control is to start with a doctor directory, sort everything by person first, and then by category. That single structural decision prevents the most common mistake: mixing up medications or allergies between family members, which creates real clinical risk.
Here is the core framework:
- Create a doctor directory first. List every provider, their role, phone, fax, and office address before touching a single document.
- Sort by person, then by category. Medications, allergies, test results, and immunizations each get their own section, but only after records are separated by individual.
- Build a one-page health summary per person. This single document, covering name, date of birth, blood type, current medications with dosages, allergies, active conditions, and emergency contacts, is the highest-value artifact you can create, according to health summary best practices.
- Keep both physical and digital copies. A binder at home plus a cloud backup means you are covered whether the power is out or you are across the country.
- Name digital files consistently. The format
YYYY-MM-DD, Provider, DocType.pdflets alphabetical sorting double as chronological order, making any file instantly retrievable. - Update after every appointment. Scan the after-visit summary before you leave the parking lot. That habit keeps the archive current. For most people, reviewing and updating records after every appointment and doing a quarterly review helps prevent obsolescence and errors.
- Use MyChart, Google Drive, Dropbox, and Apple Health as your primary digital tools for downloading, storing, and accessing records.
How to build a doctor directory that actually works
A doctor directory is the foundation of any personal health information system. Without it, you spend the first ten minutes of every emergency call trying to remember who prescribed what.
- List every provider by role. Primary care physician, cardiologist, dermatologist, pharmacist, and any specialist involved in ongoing care all belong here.
- Capture full contact details. Phone, fax, email, office address, and the specific question each provider handles. Knowing who to call for a refill versus a referral saves real time.
- Separate directories by person. If you manage records for a parent, a child, and yourself, each person needs their own directory. Mixing them is how errors happen.
- Use a simple document or digital contact list. A shared Google Doc or a note in Apple Health works fine. The format matters less than keeping it updated.
- Include after-hours and emergency lines. Your cardiologist's answering service number is worth having before you need it.
Johns Hopkins physician Alicia Arbaje calls the doctor directory especially critical for caregivers managing multiple contacts and appointments for a loved one. The directory is not just a convenience. It is the connective tissue of the whole system.
What personal health documents should you keep accessible?
Keep the last year of records within easy reach, physically or digitally. Older records can be archived, but these categories should always be current and findable:
- Personal health history. Conditions, surgeries, hospitalizations, accidents, and how each is being managed.
- Medication and allergy lists. Every prescription and over-the-counter supplement, with dosages and any known reactions. A study of patients on blood pressure drugs found that roughly 40% could not name a single one of their medications.
- Test results. Lab work, imaging reports, bone density scans, and mammograms. Tracking these over time lets you spot trends and ask better questions at appointments.
- Insurance and billing documents. Explanation-of-benefits forms and prior authorization letters, especially for ongoing treatments.
- Legal documents. Living will, advance directive, and medical power of attorney. These belong in your records, not just in a filing cabinet at your attorney's office.
- Symptom and side-effect logs. For anyone managing a chronic condition, a running log of blood pressure readings, blood sugar levels, or medication responses gives your provider real data instead of memory.
- Vaccination history. Especially relevant for travel, school enrollment, and annual wellness visits.
- Family medical history. Parents, siblings, and grandparents. Hereditary conditions inform screening schedules and risk assessments.
Pro Tip: Scan paper handouts from every appointment immediately. The phone camera in any modern smartphone is good enough. Use the built-in scanner in the iOS Files app or Google Drive on Android, and save everything as a single PDF per visit.
Which digital tools help you store and access health records?
Digital storage is not just about convenience. It is about having your records available when a new specialist asks for them in 20 minutes.
- MyChart. The most widely used patient portal in the US. Use the "Manage My Record" feature to request a full record export as a PDF bundle and a structured C-CDA file. This is your primary source for hospital and clinic records.
- Google Drive. Free, accessible from any device, and easy to share with family members or providers. Create a top-level folder per person, then subfolders by category. Pair it with Google Lens for quick document scanning.
- Dropbox. A solid alternative to Google Drive with strong file versioning, so you can recover an older version of a document if something gets overwritten.
- Apple Health. On iPhone, the Health app stores medical records directly from connected providers using FHIR R4 standards. Fill out the Medical ID section with blood type, allergies, medications, and emergency contacts. First responders can access this from your lock screen.
- File naming. Use
YYYY-MM-DD, Provider, DocType.pdffor every saved file. For example,2026-03-14, Memorial Imaging, MRI Report.pdf. Sorting alphabetically then becomes sorting chronologically, and a search by provider name finds everything instantly. - Security basics. Use a strong, unique password for every portal and cloud account. Enable two-factor authentication. For especially sensitive documents, store them in an encrypted folder using a tool like VeraCrypt or the built-in encryption on macOS and Windows.
- Bulk downloading. Pulling records from multiple portals manually is tedious. Automation tools that batch-download from portals reduce the time cost significantly and make it realistic to stay current.
For people tracking chronic conditions over time, longitudinal digital storage makes it possible to see patterns across years of lab results and appointments, not just the most recent visit.
How to keep your records current and share them when it counts
Most people treat organizing medical records as a chore rather than a patient-centered task, and that is exactly why most systems fail. The goal is not a tidy binder. It is fast, coherent sharing with clinicians or emergency responders.
- Update after every appointment. Scan the after-visit summary, download new lab results from the portal, and confirm the medication list reflects any changes made during the visit.
- Do a quarterly review. Open each patient portal, download anything new, and check that the one-page health summary is still accurate. Regular quarterly maintenance prevents records from quietly going out of date.
- Watch medication changes closely. The dose on the bottle is not always the dose most recently prescribed. Medication changes drift quietly and are the most common thing to miss between visits.
- Keep multiple copies. One digital backup in the cloud, one local copy on your device or a USB drive, and one physical copy at home. A copy in your car or bag means you have it for unplanned hospital visits.
- Prepare a shareable summary. When changing providers or being discharged from a hospital, hand the new team a clean one-page summary rather than a stack of PDFs. You can upload medical documents to Healthnavigatorai for quick evaluation and guidance on next steps.
- Set sharing permissions carefully. Give family caregivers view access to relevant records. Revoke access when circumstances change.
What are your legal rights to access health records in the US?
Under the 21st Century Cures Act and ONC information-blocking rules, healthcare providers must give you electronic access to your complete health records at no cost, using the FHIR R4 API standard. This is federal law, not a courtesy.
- Request your complete record, not a summary. Summaries omit visit notes, imaging reports, and raw lab values. Ask specifically for the full record in electronic format.
- HIPAA authorization. For records held by a provider not using a patient portal, submit a HIPAA-compliant records request form. Most hospitals publish this under "Medical Records" on their website. Secure email is the fastest delivery method when available.
- No information blocking. Providers cannot legally delay or restrict your access to your own records. If a provider refuses, file a complaint with the Office of the National Coordinator for Health Information Technology (ONC).
- Privacy in storage. Once records are in your hands, you are responsible for protecting them. Use encrypted storage, strong passwords, and two-factor authentication on every account that holds health data.
- PHR benefits are documented. Research from Johns Hopkins and Mayo Clinic shows that maintaining a personal health record improves health outcomes by giving patients and caregivers a comprehensive view accessible in emergencies.
A well-organized personal health record is also the foundation for getting more from every medical appointment. When you arrive with a current medication list, a symptom log, and your test history, your provider spends less time reconstructing your background and more time on the actual problem.

Key Takeaways
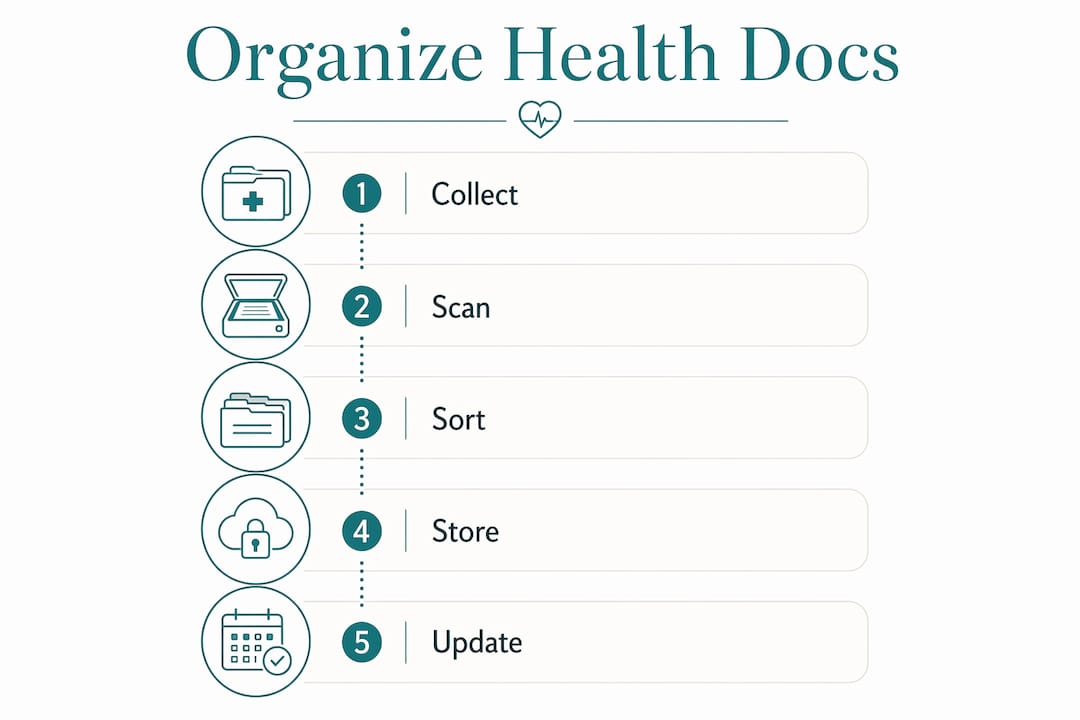
Organizing your personal health documents starts with a doctor directory and a person-first filing structure, then relies on consistent digital tools and regular updates to stay useful.
| Point | Details |
|---|---|
| Start with a doctor directory | List every provider's role, phone, fax, and address before organizing any documents. |
| Sort by person, then category | Separating records by individual prevents clinical errors like mixed medication lists. |
| Build a one-page health summary | Include name, DOB, blood type, medications, allergies, conditions, and emergency contacts for fast reference. |
| Use YYYY-MM-DD file naming | This format makes alphabetical sorting identical to chronological order for instant retrieval. |
| Update after every appointment | Scanning the after-visit summary before leaving the parking lot and reviewing records quarterly keeps the archive current and complete. |


